Tuning your own piano

A basic tutorial on how to tune your own piano using the PianoMeter app

Tuning your own piano can be a daunting task for the inexperienced, as it takes time, effort, and focus. This is a basic guide to get you started, with the disclaimer that attempting this may result in problems that will take a professional piano technician to fix (like broken strings).

Contact

Use the right tools

As with any job, you need to use the right tools.

Easy piano Tuner

Electronic tuning device (ETD)

An off-the-shelf chromatic tuner or generic tuning app will not work for tuning anything but the center-most keys on a piano. This is because regular chromatic tuners can’t account for the unique “stretched tuning” that is required for a piano to actually sound in tune with itself. While professional piano tuning software typically costs hundreds of dollars, the “Plus” version of PianoMeter is priced for hobbyists and is intended to be the ideal intersection of professional-quality tuning, low cost, and ease of use.

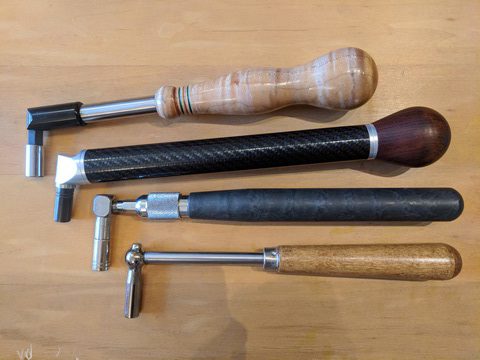
Tuning lever and mutes

Professional tuning levers can cost hundreds of dollars, but you can find cheaper ones that are adequate for beginners. Expect to pay around $40 minimum for a decent lever. (Do not purchase the ~$20ish “gooseneck” levers.)

You should also obtain a couple of rubber or felt mutes, and (for uprights) a thin treble mute or Papps mute for the highest notes on the piano.

The tuning process

01

Establish a tuning curve

Open PianoMeter and use the menu in the upper left to create a New Tuning File, which will clear out any information from previous usage. Then play several notes across the range of the piano so PianoMeter can listen to the piano and calculate a tuning curve. I typically play 2 notes per octave, but you can do as many as you like. (You can actually sample all the notes in under 2 minutes, playing each note for one second each.)

02

Pitch adjustment

If your piano is very out of tune (more than 10 or 15 cents flat) you should consider tuning it in two passes: a quick “rough” pass to get the piano in the ballpark, followed by a slower fine-tuning. The pitch adjustment gives you an added benefit of letting PianoMeter sample all the notes for a more precisely calculated tuning in the fine tuning pass.

03

Tuning order

For this tutorial we will start at the bottom of the tenor break (where the strings cross over each other) and tune up through the midsection to the top of the piano. Then we go back to the tenor break and tune the bass notes, proceeding toward the left side of the piano.

04

Placing the mutes and mute order

You will notice that most notes on the piano have 3 strings per note. However you can only tune one string at a time because you (and your tuning software) can’t listen to 2 strings at once. Because of this you will start by using rubber or felt wedge mutes to mute all but 1 string, which you tune with PianoMeter. When that first string is in tune, you move a wedge mute to free a second string, and then tune that string “by ear” to the first string. When the two strings are in tune you un-mute the third and tune it by ear as well.

There are multiple methods for the mute movement and tuning order. I will summarize them all, but recommend the first “left to right” method for beginners.

05

Left to right (straightforward)

I recommend “left to right” as the most simple and straightforward method, as it carries the least risk of tuners getting confused and placing the tuning lever on the wrong pin (and thereby breaking strings). Simply put, you will be tuning the strings from left to right.

  1. Begin on the lowest note that has 3 strings (typically the first strings that don’t have copper winding). Start by placing a wedge mute between the middle and right strings of the 3 “unison” strings. Tune the left string to the tuner until the strobe stops.
  2. Move the mute one string to the right so it’s in the wide space between two notes. With the right string now muted, tune the center string by ear to the left string.
  3. Move the mute two strings to the right so that it mutes the center and right strings of the next note. Tune the last (right) string of the current note by ear to the other two strings. You are now set up to begin at step 1 for the next higher note.

The beauty of this method is that the pattern of moving the tuning lever from pin to pin is simple, moving down each vertical row of tuning pins, so you don’t have to spend time searching for the correct pin matching the string you’re tuning. This method works for all “trichords” (notes that have 3 strings). For notes in the bass section that have 2 strings use a modified “right to left” pattern, placing the mute between strings of adjacent notes.

06

Leapfrog (difficult)

The leapfrog method is faster but more complicated and takes a lot of practice to master and not get “lost” in the tuning pins. It uses two wedge mutes. The mutes are placed only in the large spaces between the groups of 3 strings, leaving the center string of one note un-muted. Without moving the mutes, you will be tuning three strings on three different notes.

  1. To get started, use the “left to right” method to tune the left and center strings of the lowest “trichord” (call it note 1). There should now be one mute between the right string of note 1 and the left string of note 2, and a second mute between the left and right strings of notes 2 and 3.
  2. Tune the center string of note 2 to the tuner. (The left and right strings of note 2 are both muted.)
  3. Move the left mute so that it is between the strings of notes 3 and 4. It now becomes the right mute. Note 1 now has all 3 strings un-muted, note 2 has 2 strings un-muted, and note 3 has only the center string un-muted.
  4. Tune the right string of note 1 by ear to the left and center strings. Tune the left string of note 2 to the center string. Tune the center string of note 3 to the tuner.
  5. Repeat steps 3 and 4, leapfrogging the mutes up the piano.

For the treble notes where leapfrogging becomes impractical (because of space issues) use a treble mute between the hammers with the “left to right” method. For the bass notes use the “right to left” method.

07

Strip mute (tune all center strings, then unisons)

Another method for tuning the center range of the piano is to use a long felt “strip mute” that is inserted in each large spaces between the right and left strings of each note. This allows you to mute all but the center strings of each trichord for an entire section of the piano. You can tune the whole section, center strings only, to the tuner, test things out to make sure they sound good, and then pull the strip mute out one string at a time, tuning the left and right strings after each pull. While inserting the temperament strip, be sure to press and hold the damper (right) pedal so you don’t pinch off the tips of the damper felt between the strings as you insert the mute.

08

Tuning Unisons

Tuning multiple strings of the same note (called a “unison”) so that their pitches match exactly takes practice. First, you must be able to hear when a unison is out of tune. If one string is tuned slightly sharp or flat of the others, you will hear a “wah-wah-wah” sound that piano tuners call “beating”. As the strings are brought closer in tune with each other, the beating slows, then stops when the strings are perfectly in tune. I recommend taking some time and simply practicing with two strings only until you can reliably hear the “beats” and make them stop.

If you don’t want to learn to tune unisons by ear, you can ignore the mute moving patterns above and use two mutes to tune “string-by-string”. This involves making sure only one string is unmuted at a time, and tuning each string directly to PianoMeter. In my experience, this ends up being a slower process in the long run, but you can achieve good results this way as well.

09

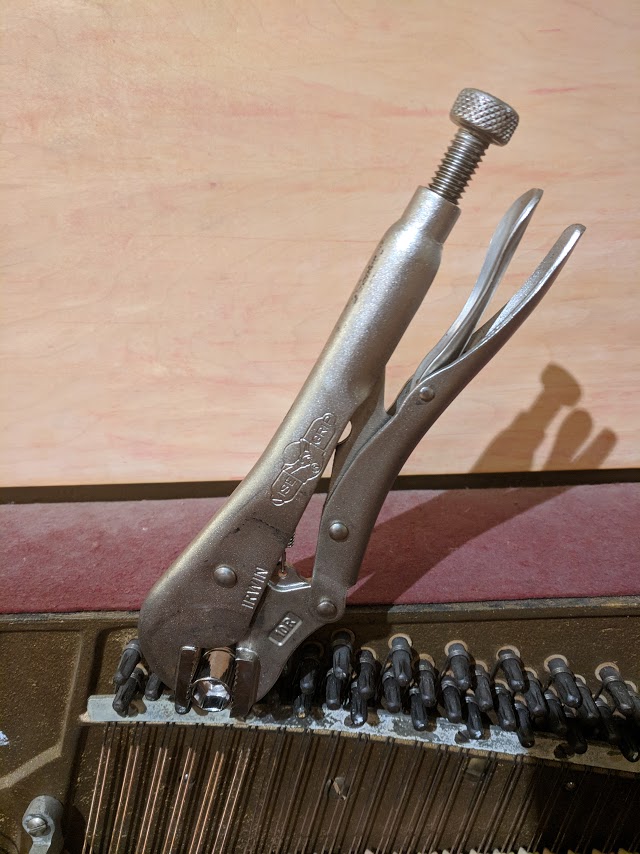
Turning the pins

Turning the tuning pins is a bit more complicated than just putting the lever on and twisting. This, possibly more than anything else, is what differentiates between a master tuner and an amateur. Each tuner will eventually develop their own technique, but here are some general tips.

  • Try to place the lever on the tuning pin so that the handle of the lever is roughly parallel with the string. On an upright piano, the handle will be pointing up, in about the 12:00 to 2:00 position. On a grand piano the lever will point away from the keyboard.
  • Hold the lever as far out on the handle as possible for maximum leverage.
  • Use firm but controlled movements for tuning the pin. A little bit of motion goes a long way! Some tuners use short controlled jerks to move the pin tiny amounts, while others use slow controlled pulls and pushes to turn the pin slowly. Try to “feel” the pin turning in the pin block.
  • If you are turning the pin but can’t hear the pitch changing, Stop! You may have the lever on the wrong note, or you might have accidentally muted the string you are trying to tune. This is the #1 cause of broken strings for beginners.
  • Make sure that the tuning pin is “settled” in the pin block before moving on. The pin may seem rigid to you, but it is bendable and “twistable” and it is possible to change the pitch of the string by just twisting the top of the pin without actually turning the pin in the pinblock. Many tuners counter this by pulling the lever clockwise so that the string goes just slightly above pitch and then correcting counter-clockwise so the string goes in tune as the internal torques of the tuning pin are neutralized.
  • One test for if the tuning pin is settled is to very gently rattle the lever back and forth without turning the pin. If the note goes out of tune then the pin wasn’t stable. (It’s better to find out that it wasn’t stable while you are tuning the piano than to have it go out of tune the next day.)

Other resources for DIY piano tuners

This is meant to be a bare-bones guide to get you started. There are many other resources online, including YouTube video tutorials. Here are a few of the better resources I have found:

How to Tune a Piano: Step-by-step procedure & proper tools

A free tutorial written by a hobbyist and aimed at other DIYers.

LEARN MORE
toolbox-repairing
Tune Your Own Piano: a DIY Tutorial

A very thorough tutorial with step-by-step instructions, tons of illustrations, tool recommendations, and side-by-side instructions for PianoMeter and TuneLab software.

LEARN MORE
How to Tune Pianos: Complete Online Piano Technician Training

A fairly comprehensive mix of free and paid courses from a professional piano technician, aimed at people just starting out in piano technology. It starts with basic tuning, but also has courses on piano repair and regulation.

LEARN MORE